

Wood veneer sheets are thin slices of real wood that you can apply to surfaces to create a natural wood look without using solid wood. Unlike solid wood or engineered wood, wood veneer sheets offer a unique blend of authentic grain and cost efficiency. Take a look at the table below to see the key differences:
Factor | Wood Veneer Sheets | Solid Wood | Engineered Wood |
|---|---|---|---|
Appearance | Authentic or uniform grain | Natural grain | Consistent texture |
Cost | Lower | Higher | Lower |
Maintenance | Can be refinished | Easy to refinish | Limited refinishing |
Over the last decade, wood veneer sheets have become a favorite in diy projects. You see them everywhere—from furniture to wall panels—thanks to their premium look, easy application, and increasing demand for eco-friendly options.
Key Takeaways
Wood veneer sheets are thin slices of real wood that give a natural wood look at a lower cost and weight than solid wood.
There are different types of veneer sheets, like raw, paper-backed, and phenolic-backed, each suited for specific projects and budgets.
Veneer sheets work great for furniture, cabinets, and decorative DIY projects, offering flexibility, style, and eco-friendly benefits.
Applying veneer requires careful preparation, cutting, gluing, pressing, and finishing to achieve a smooth, durable surface.
Wood veneer sheets offer a premium look and sustainability compared to solid wood and laminate, making them a smart choice for many projects.
Wood Veneer Sheets Overview
What Are Wood Veneer Sheets?
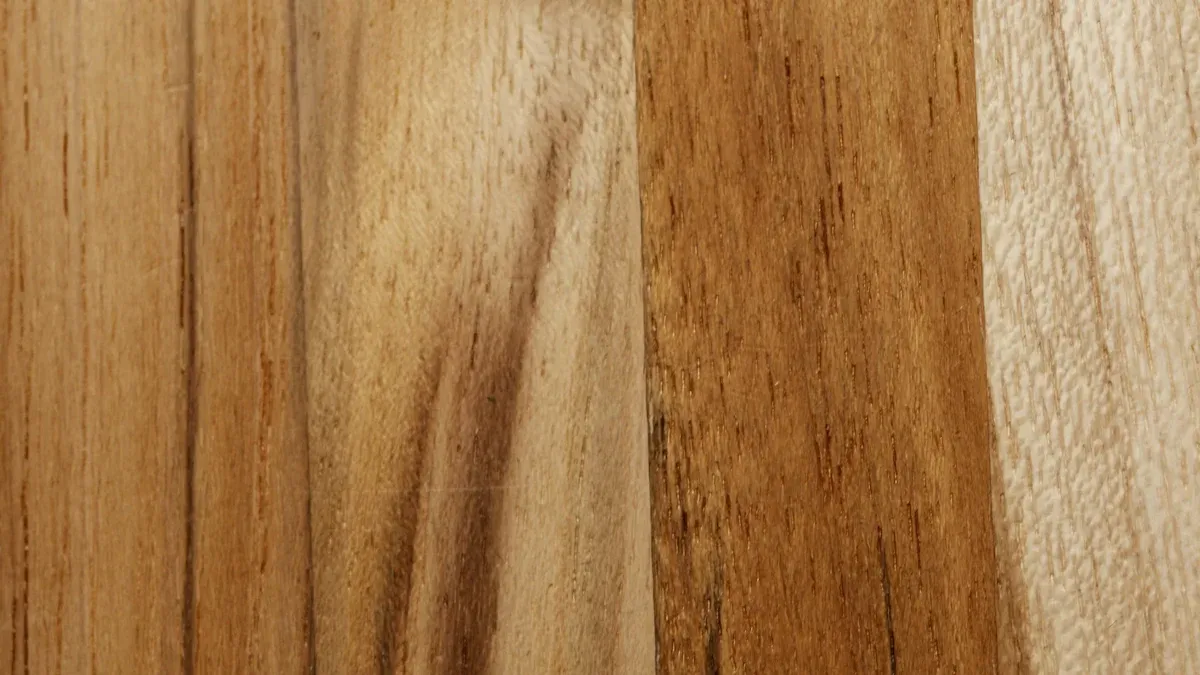
When you look at wood veneer sheets, you see thin slices of real wood, usually less than 1/16 inch thick. You can use these sheets to cover surfaces like plywood, MDF, or even old furniture. This gives your project the look and feel of solid wood without the heavy cost or weight.
You might wonder how these sheets are made. The process starts with selecting high-quality logs. Workers remove the bark and then soak or steam the logs to soften the wood fibers. This step helps create clean, thin slices. Next, machines cut the logs using different techniques—rotary, flat, quarter, or rift cutting—depending on the grain pattern you want. After slicing, the sheets go through drying, trimming, and quality checks. Finally, manufacturers package the sheets to keep them safe and ready for your next DIY project.
Tip: If you want a specific grain pattern or color, check with your wood veneer supplier. They can help you find the right species and cut for your project.
Types of Wood Veneer Sheets
You have several types of wood veneer sheets to choose from, each with its own strengths. Here’s a quick look at the most common options:
Veneer Type | Description | Flexibility & Handling | Typical Applications | Cost Ranking (Low to High) |
|---|---|---|---|---|
Raw Veneer | Unprocessed after cutting, requires finishing | Most flexible, great for curves | Staining, painting, custom work | Lowest cost |
Paper-Backed Veneer | Veneer bonded to backing paper | Flexible, easy to handle | Cabinets, intricate designs | Moderate cost |
Phenolic-Backed Veneer | Veneer backed with phenolic resin paper | Less flexible, very stable and durable | Countertops, high-wear surfaces | Highest cost |
You’ll also find specialty options like 10 mil paper-backed veneer for vacuum pressing, 22 mil bubble-free veneer for easier gluing, and 3-ply wood-on-wood veneer for projects that need both flexibility and durability.
If you’re curious about which wood species are most popular for veneer, check out this table:
Wood Species | Unique Properties | Typical Applications |
|---|---|---|
Red Oak | Prominent grain, warm tones, stains well, durable | Furniture, cabinetry |
Maple | Light color, smooth grain, good for painting | Modern furniture, millwork |
Walnut | Rich dark color, swirling grain, premium look | High-end furniture, accents |
Mahogany | Deep reddish-brown, straight grain, moisture resistant | Paneling, instruments |
Cherry | Warm reddish-brown, ages gracefully | Cabinets, millwork |
Teak | Water-resistant, oily texture | Outdoor furniture, marine use |
Rosewood | Deep color, striped grain, oily | Musical instruments, luxury furniture |
Ebony | Very dark, fine grain, dense | High-end cabinetry, instruments |
Ash | Light color, straight grain, stains well | Contemporary furniture |
Birch | Light color, subtle grain, versatile | Furniture, cabinetry |
Note: Harder woods like maple, white oak, and wenge resist wear best. If you want a surface that stands up to heavy use, engineered wood veneer or polyester veneer can be a smart choice. These options offer more durability and easier maintenance, especially for high-traffic furniture.
With so many choices, you can always find a wood veneer sheet that fits your style, budget, and project needs.
Uses for Wood Veneer Sheets
Furniture and Cabinets
You can transform your furniture and cabinets with wood veneer sheets. Many people choose to apply veneer to furniture because it gives a classic wood look without the high price of solid wood. You see veneer on kitchen cabinet fronts, dressers, tables, and shelving. It works well for both modern and traditional styles. Veneered cabinets use MDF or plywood as a backing, making them lighter and more stable than solid wood. This means your cabinets resist warping and cracking, even with temperature changes.
Here are some reasons why wood veneer sheets are so popular in furniture and cabinet making:
You get a wide range of wood species and grain patterns, including exotic options.
Veneer lets you create curved designs and custom shapes that solid wood can't match.
Cabinets with veneer are more affordable and environmentally friendly, using less hardwood.
Veneer surfaces can be stained or painted, so you can match any color scheme.
The natural grain and texture add warmth and character to your space.
Tip: If you want a unique look, try mixing different veneer species or patterns. You can create eye-catching contrasts and designs that stand out.
Check out this table for a quick comparison of wood veneer benefits in cabinets:
Feature | Benefit |
|---|---|
Appearance | Authentic wood grain, many finishes |
Durability | Resists warping, stable over time |
Cost | More affordable than solid wood |
Sustainability | Maximizes wood usage, eco-friendly |
Maintenance | Easy to clean, can be refinished |
Decorative DIY Projects
Wood veneer sheets open up a world of possibilities for diy enthusiasts. You can tackle small projects like decorative boxes, custom shelving, or even wall art. Veneer is easy to cut and shape, so you can experiment with creative ideas. Many people use veneer for wall paneling, ceiling designs, and built-in storage solutions. These projects add texture and depth to your home without breaking the bank.
Here are some fun diy project ideas using wood veneer sheets:
Create a custom headboard with a unique wood pattern.
Design a coffee table or nightstand with a mix of veneer species.
Build decorative boxes for gifts or storage.
Add veneer to shelves for a professional finish.
Make artistic wall panels or ceiling accents for a cozy vibe.
Veneer sheets let you customize each project. You can match colors, grains, and finishes to your style. The thin slices make it easy to apply veneer to furniture or curved surfaces, giving you more design freedom. Plus, veneer is sustainable and efficient, so you can feel good about your diy choices.
Note: Always seal and finish your veneer projects to protect them from moisture and wear. This step keeps your creations looking beautiful for years.
Veneer Application Steps
Ready to transform your project with a professional finish? This step-by-step guide will walk you through the entire veneer application process. You’ll learn how to prepare, cut, glue, press, and finish your wood veneer sheets for stunning results. Whether you’re working on furniture, cabinets, or a custom wood veneer accent, these techniques will help you achieve a flawless look.
Prepare and Cut Veneer
Preparation is the foundation of every successful veneer application. Start by gathering your supplies and setting up a clean, organized workspace. You’ll want to keep your tools within reach and your veneer sheets flat and protected.
Here’s a step-by-step guide to help you mark and cut veneer accurately:
Measure your substrate and mark the veneer sheet with a pencil or fine marker.
Place a metal straight edge or ruler along your cut line.
Use a sharp utility knife or craft knife to score the veneer. Make several light passes instead of one deep cut to avoid tearing.
For thicker veneer, use a veneer saw for a smooth edge.
Always cut on a cutting mat to protect your work surface and prevent slipping.
Secure the veneer and substrate with clamps to keep everything steady.
After cutting, smooth the edges with fine-grit sandpaper or a file.
For intricate shapes, a rotary tool or chisel works well.
Tip: Always wear safety glasses, a dust mask, and cut-resistant gloves when you cut veneer. Keep your workspace tidy and well-ventilated to avoid accidents.
Essential Supplies for Cutting Veneer:
Utility knife or craft knife
Veneer saw
Metal straight edge or ruler
Cutting mat
Clamps
Fine-grit sandpaper
Rotary tool or chisel
File or edge sander
Taking your time with preparation and cutting ensures your veneer fits perfectly and looks seamless.
Apply Veneer Adhesive
Once you’ve cut your veneer, it’s time to apply the glue. Choosing the best adhesive for applying wood veneer depends on your project and substrate. Here’s a quick table to help you compare options:
Adhesive Type | Best For | Advantages | Application Tips |
|---|---|---|---|
PVA Glue (Yellow/White) | General veneering on wood/MDF | Strong bond, easy cleanup | Thin layer, clamp or press while drying |
Contact Cement (e.g., weldwood contact cement) | Large surfaces, quick projects | Instant bond, waterproof, no clamps needed | Apply to both surfaces, let dry, then press |
Urea-Formaldehyde Glue | Professional, large-scale work | Long open time, strong, heat resistant | Mix powder, apply, clamp, cure 12-24 hours |
Epoxy | Irregular/high-durability jobs | Waterproof, versatile | Mix, apply, clamp securely |
Hide Glue | Restoration, fine woodworking | Reversible, flexible, natural | Apply warm, clamp while drying |
For most DIY projects, PVA glue or weldwood contact cement are popular choices. Weldwood contact cement is especially handy for large, flat surfaces because it bonds instantly and doesn’t require clamping. If you want a professional-grade bond, urea-formaldehyde glue or specialty veneer glue can give you extra strength and durability.
Step-by-Step Guide to Applying Adhesive:
Make sure both the substrate and the back of the veneer are clean and dust-free.
Apply the adhesive evenly to both surfaces. Use a brush, roller, or adhesive spreader for full coverage.
For contact cement (like weldwood contact cement), coat both the veneer and substrate, then let them dry until tacky.
If you use PVA or veneer glue, apply a thin layer to the substrate only, then position the veneer.
Double-check your alignment before you attach the veneer. Once contact cement touches, you can’t reposition it.
Work in a well-ventilated area and wear gloves to protect your skin from adhesives.
Note: Always follow the manufacturer’s instructions for drying times and open times. For most glues, you’ll need to let the adhesive cure for at least 24 hours before applying finishes.
Press and Trim Veneer
Now comes the most satisfying part—pressing and trimming your veneer for a flawless finish. This step-by-step guide will help you avoid bubbles, misalignment, and other common mistakes.
Techniques for Pressing Veneer:
Carefully align the veneer with your substrate, using guides or clamps to keep it in place.
Lay the veneer down gently, starting from one edge and smoothing toward the other to push out air bubbles.
Use a roller, squeegee, or caul to apply even pressure across the entire surface.
For large or curved projects, a vacuum press or industrial veneer press can give you the most uniform results.
Clamp the panel securely or use weights to hold the veneer in place while the glue cures.
Let the adhesive dry fully before moving to the next step.
Tips to Prevent Bubbles and Misalignment:
Work slowly and methodically, pressing from the center outward.
Apply adhesive in thin, even layers to avoid lumps.
Use clamps, cauls, or a vacuum press for even pressure.
Avoid excess glue, which can cause bubbles under the veneer.
Once the glue has set, trim any overhanging veneer with a sharp utility knife or edge trimmer. Sand the edges lightly with fine-grit sandpaper for a smooth, professional look.
Pro Tip: Veneer both sides of a panel to prevent warping, especially for doors or tabletops.
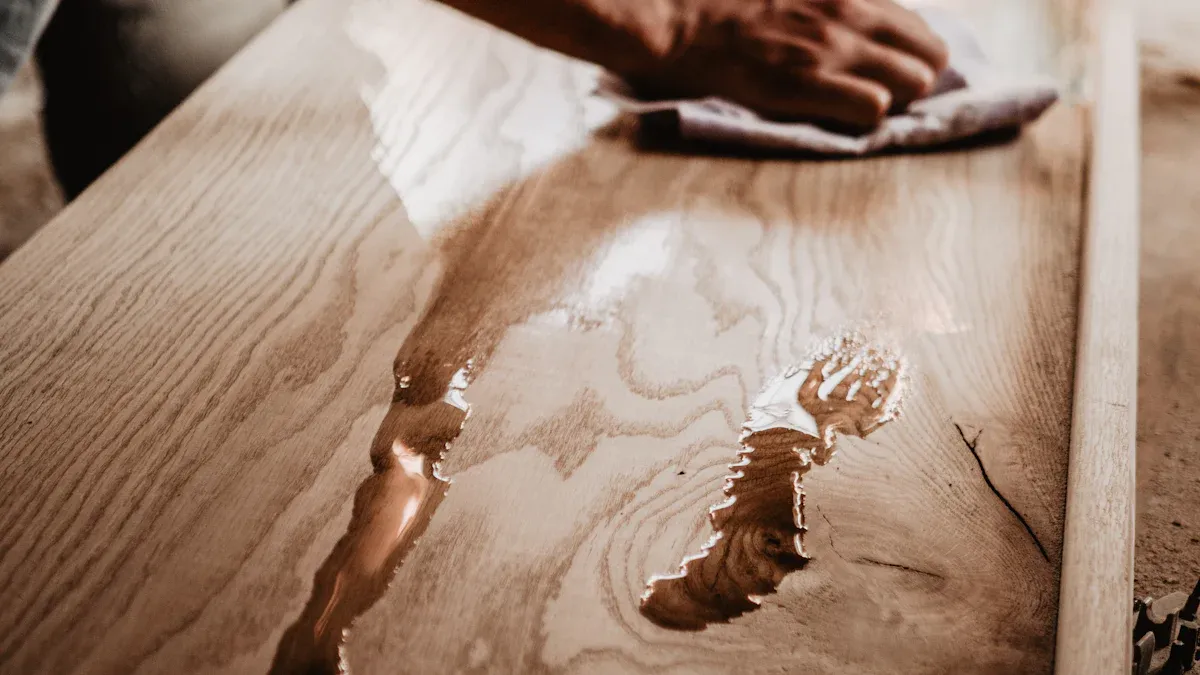
Finishing Touches: Sealing and Protecting Your Veneer
After you apply wood veneer and trim the edges, it’s time to seal and finish your project. This step protects your veneer from moisture, UV rays, and daily wear. Choose a finish that matches your needs:
Polyurethane and varnish offer strong protection and a natural sheen.
Lacquer dries quickly and gives a hard, glossy finish.
Hard-wax oils provide a softer, natural feel and are easy to repair.
For outdoor projects, use spar varnish or marine-grade polyurethane for UV and water resistance.
Apply your chosen finish in thin, even coats, letting each layer dry completely before adding the next. Regular maintenance, like cleaning and reapplying finishes every few years, will keep your veneer looking beautiful for a long time.
Remember, the right preparation, adhesive, and finishing techniques make all the difference in veneer application. With this step-by-step guide, you can confidently apply the wood veneer to any project and achieve professional results.
Apply Wood Veneer: Tips & Best Practices
Choosing Substrates
When you get ready to apply wood veneer, picking the right substrate makes a huge difference. You have several choices, like solid timber, particleboard, medium density fibreboard (MDF), plywood, and blockboard. Each one works best for different projects. For example, MDF and plywood are popular for furniture and cabinets because they stay flat and resist warping. If you want a natural wood feel, utility-grade wood backings such as poplar or birch in 2-ply wood-on-wood veneers give you great stability. Phenolic resin-impregnated backings are perfect for areas with lots of moisture or heavy use, like kitchens or marine projects.
Here’s what you should consider before you apply wood veneer:
Project type and size
Desired finish and grain pattern
Quality of substrate from trusted wood veneer suppliers or a reputable wood veneer company
Tools and fabrication methods
Environmental conditions (keep humidity between 40% and 60%, and temperature steady)
Tip: Always let your wood veneer sheets acclimate in the room for at least 48 hours before you apply wood veneer. This helps prevent cracking or bubbling later.
If you want a custom wood veneer look, talk to your supplier about grain patterns and cutting methods. The finish you choose will also affect the final appearance, so plan ahead!
Common Mistakes to Avoid
You want your project to look professional, so watch out for these common mistakes when you apply wood veneer. Check out this table for quick tips:
Common Mistake | What Happens | How You Can Avoid It |
|---|---|---|
Not preparing the surface properly | Poor adhesion, bubbles, peeling | Clean, sand, and dry the surface |
Using the wrong tape or adhesive | Weak bond, rough finish | Use recommended tape and glue for veneer |
Overheating or underheating tape | Damaged tape or weak bond | Use medium heat and test on scrap first |
Skipping trimming and smoothing | Jagged edges, rough look | Trim with sharp knife, sand edges lightly |
Ignoring post-installation care | Short lifespan, damage | Clean gently, avoid moisture, inspect often |
You should also measure and cut carefully. Double-check your measurements before you apply wood veneer. Pick the right adhesive for your substrate—PVA glue works well for wood-to-wood, while contact cement is best for large or moisture-prone surfaces. Always clamp evenly and let the glue cure in a stable environment. Over-sanding can ruin your veneer, so use fine-grit sandpaper and go slow.
Remember: Acclimate your wood veneer sheets to the room’s temperature and humidity. This simple step helps you avoid expansion, contraction, and surface failures.
If you follow these tips, you’ll find it much easier to apply wood veneer and get a smooth, durable finish. Whether you’re working with custom wood veneer or standard sheets, a little extra care goes a long way!
Wood Veneer Sheets vs. Other Wood Products
Veneer vs. Solid Wood
When you compare wood veneer sheets to solid wood, you notice some big differences in cost, appearance, and sustainability. Wood veneer sheets give you the look of real wood at a much lower price. You can cover large surfaces with thin slices of hardwood, which means you use less timber and save money. Solid wood costs more and often comes with issues like warping or cracking, especially if you live in a place with changing weather.
Take a look at this table to see how costs stack up:
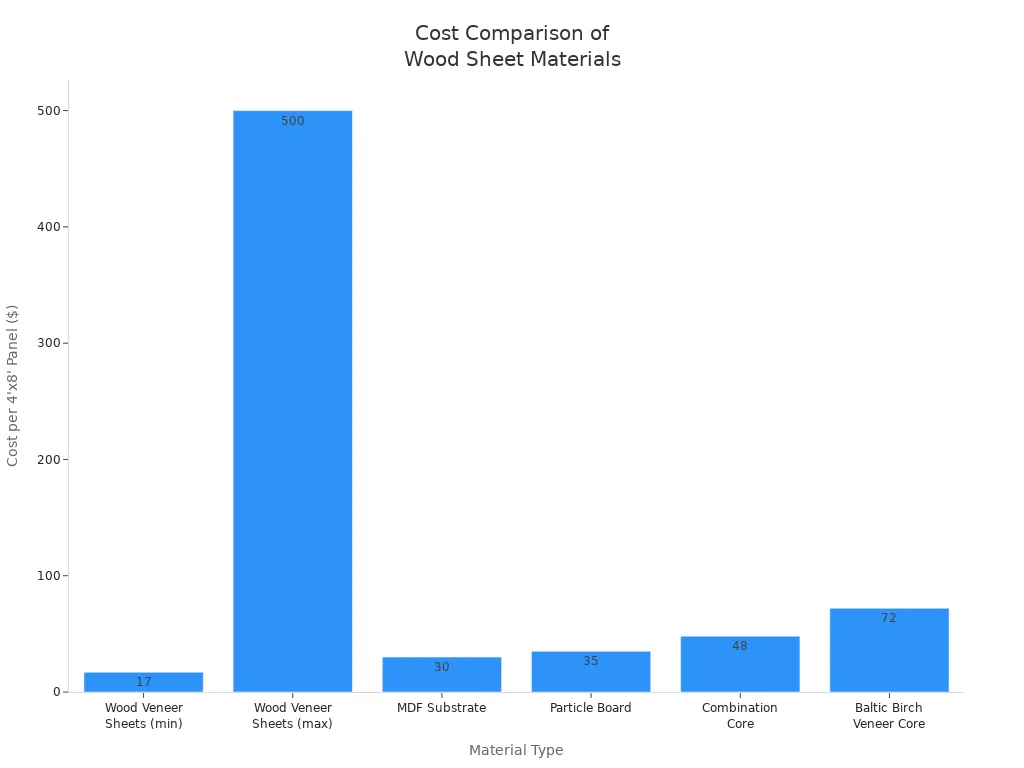
Material Type | Cost Range (per ¾” 4'x8' panel or sheet) | Notes |
|---|---|---|
Wood Veneer Sheets | $17 to over $500 per sheet (varies by species and size) | Less expensive; cost reflects veneer only; suitable for self-lamination and control over use |
Custom Plywood Substrates | MDF: $30, Particle Board: $35, Combination Core: $48, Baltic Birch Veneer Core: $72 | Veneer laminated to substrate; higher cost due to substrate and professional lamination |
Solid Wood | More expensive, less uniform | Prone to warping and cracking; no direct price comparison |
Wood veneer sheets also win when it comes to sustainability. You use thin layers, so you maximize wood yield and reduce waste. Many wood veneer suppliers and wood veneer companies offer FSC or PEFC certified products, which means you support responsible forest management. Veneer production uses less energy and creates fewer emissions than solid wood. The lighter weight of veneer sheets makes shipping easier and greener.
Tip: If you want a high-end look without the high-end price, ask your wood veneer supplier about custom wood veneer options. You can choose the species and grain that fit your style and budget.
Veneer vs. Laminate
You might wonder how wood veneer sheets stack up against laminate surfaces. Both materials help you create stylish furniture and cabinets, but they have some key differences.
Wood veneer sheets give you a real wood look with unique grain patterns. Laminate offers a uniform, consistent appearance but lacks the depth and feel of natural wood.
Veneer is softer and can scratch or dent more easily. Laminate resists scratches, stains, and moisture, making it perfect for busy kitchens or offices.
You can refinish veneer by sanding and staining. Laminate is harder to repair if damaged.
Veneer needs more careful maintenance. You should use coasters, clean spills quickly, and avoid harsh cleaners. Laminate is easy to clean with mild soap and water.
Here’s a quick table to help you compare:
Aspect | Wood Veneer Sheets | Laminate Surfaces |
|---|---|---|
Composition | Thin layer of real wood with unique grain patterns | Synthetic layers of paper and resin mimicking wood |
Appearance | Authentic, natural look with depth and tactile feel | Uniform, consistent appearance but lacks real wood depth |
Durability | Susceptible to scratches, moisture, and impacts; can be sanded and refinished | More resistant to scratches, stains, and moisture; low maintenance |
Maintenance | Requires careful polishing and protection | Generally low-maintenance, easy to clean |
Cost | More expensive due to real wood | More affordable, mass-produced |
Applications | High-end furniture and cabinetry | Practical, high-traffic areas like kitchens and offices |
If you want a premium finish and don’t mind a little extra care, wood veneer sheets are the way to go. For high-traffic areas or easy cleaning, laminate might suit you better. Many wood veneer suppliers and wood veneer companies offer both options, so you can pick what works best for your project. If you want something unique, ask about custom wood veneer for a truly personal touch.
Note: Always check with your wood veneer supplier for care instructions. Proper maintenance keeps your wood veneer sheets looking beautiful for years.
You’ve seen how wood veneer sheets can transform your project with a premium look, cost savings, and sustainable design. Many DIYers say their first veneer project feels intimidating, but it quickly becomes fun and rewarding. You get flexibility, durability, and endless creative options—plus, veneer sheets are easy to repair and maintain. If you’re new, start with a small project like a decorative box or shelf. You’ll build confidence and discover just how enjoyable working with wood veneer sheets can be!
FAQ
What are wood veneer sheets made from?
You get wood veneer sheets from thin slices of real wood. Manufacturers cut these sheets from logs using special machines. The sheets keep the natural grain and color. Many wood veneer suppliers offer a wide range of wood species for your projects.
Can I order custom wood veneer for my project?
Yes! Many wood veneer suppliers and every top wood veneer company offer custom wood veneer options. You can pick the wood species, grain pattern, and even the sheet size. This way, your wood veneer sheets match your exact style and needs.
How do I choose the best wood veneer company?
Look for a wood veneer company with good reviews, a wide selection, and helpful customer service. Reliable wood veneer suppliers will answer your questions, offer samples, and help you find the right wood veneer sheets or custom wood veneer for your project.
Are wood veneer sheets durable for everyday use?
Wood veneer sheets hold up well when you apply and finish them correctly. You should seal the surface to protect against scratches and moisture. For high-traffic areas, ask your wood veneer suppliers about tougher finishes or engineered custom wood veneer options.
Where can I buy quality wood veneer sheets?
You can buy wood veneer sheets from local wood veneer suppliers, specialty woodworking stores, or directly from a wood veneer company online. Many suppliers offer custom wood veneer and ship nationwide. Always check reviews and ask for samples before you order.


