

You might wonder what sets wood veneer apart from other types of veneer. Wood veneer sheets use real wood, so you get authentic grain and texture, unlike printed laminates. If you’re just starting out or tackling DIY projects, knowing these differences helps you pick the right material and tools.
You can stain and refinish wood veneer, which gives you design flexibility and durability.
Veneering isn’t just for experts; it’s a respected technique that lets you create beautiful, stable surfaces without breaking the bank.
Key Takeaways
Wood veneer sheets use real wood, offering authentic grain and texture that printed laminates cannot match.
Wood veneer is affordable, eco-friendly, and flexible, making it ideal for furniture, cabinetry, and DIY projects.
Choosing the right veneer depends on your project’s needs, balancing appearance, durability, cost, and sustainability.
Applying wood veneer requires proper tools, careful surface preparation, and attention to grain direction for the best results.
Custom wood veneer options let you select species and patterns, giving you unique, high-quality finishes tailored to your style.
Wood Veneer
What It Is
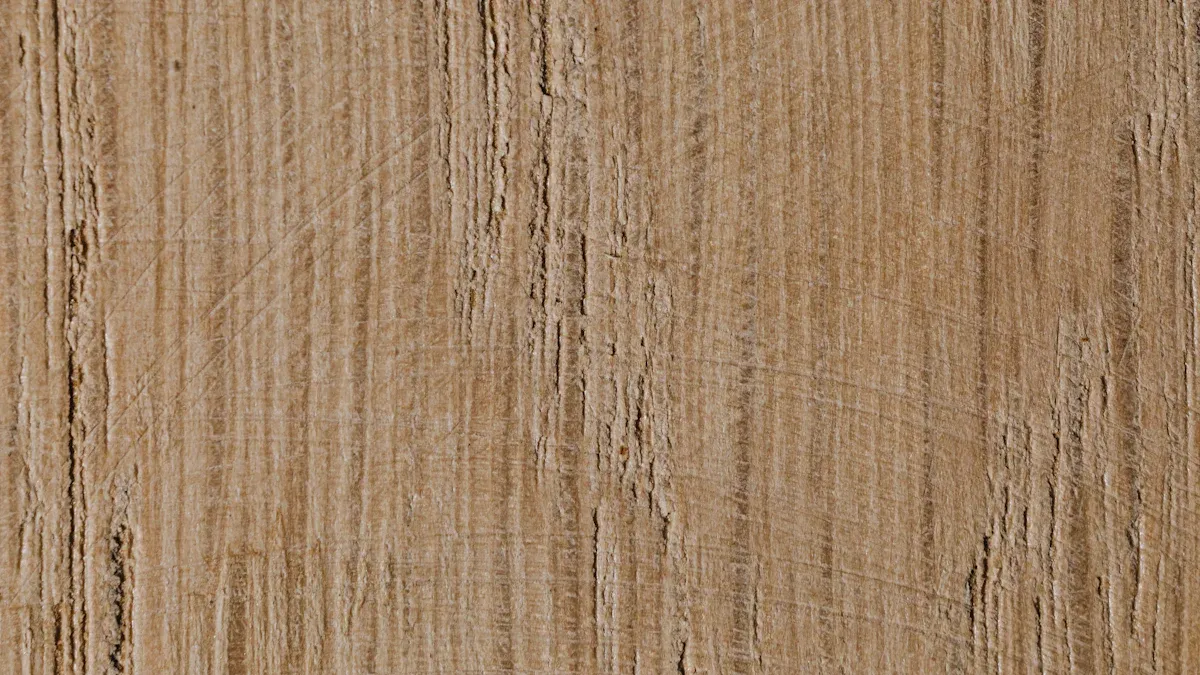
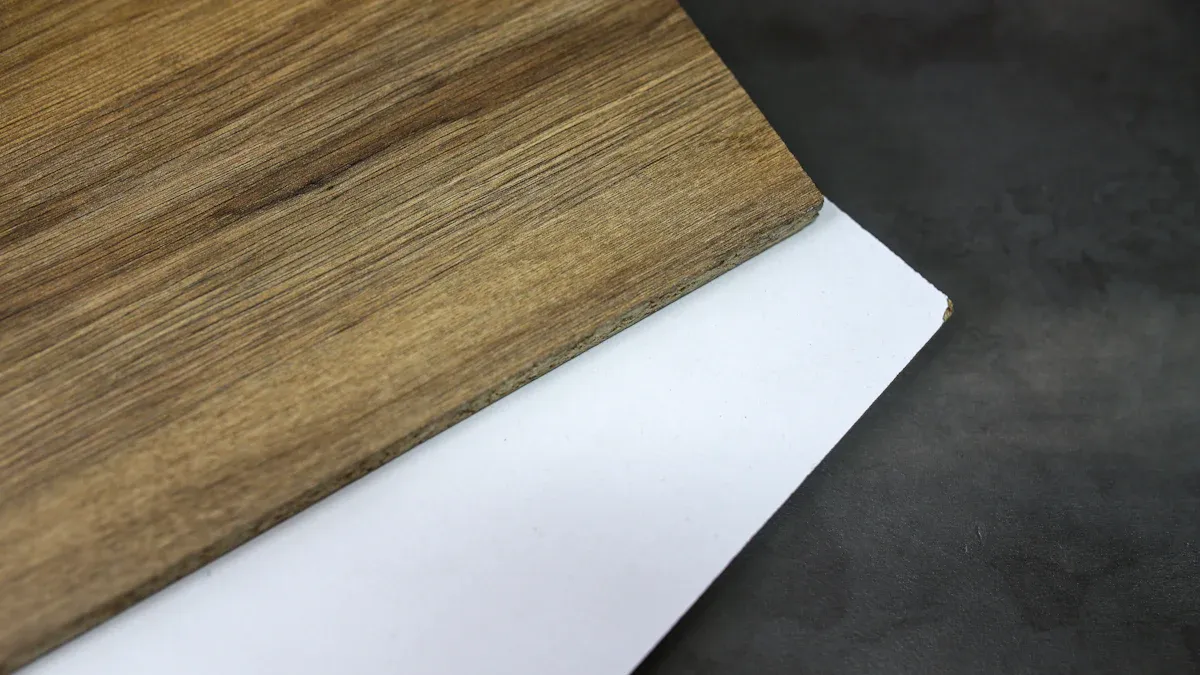
Wood veneer sheets are thin slices of real wood, usually less than 1/8 inch thick, that you can apply to a surface to give it the look and feel of solid wood. You get these sheets from logs using different cutting methods like plain, quarter, rift, or rotary cuts. Each method creates its own unique grain pattern, so you can pick the look you want for your project. When you choose wood veneer sheets, you get the authentic texture and warmth of wood, not just a printed pattern.
You’ll notice natural features in wood veneer sheets, such as pin knots, mineral streaks, or even small worm tracks. These aren’t defects—they add character and make each piece unique. Industry standards, like those from the Architectural Woodwork Institute, guide wood veneer suppliers and wood veneer companies to ensure quality and consistency. If you want something special, many wood veneer suppliers offer custom wood veneer options, letting you select the species, grain, and even the figure you prefer.
Tip: When you work with wood veneer sheets, always check the grain direction and natural markings. These details can make your finished piece stand out!
Common Uses
You’ll find wood veneer sheets in all sorts of places. Furniture makers love them for tables, chairs, and storage units because they give you the beauty of hardwood without the cost or weight. Wood veneer sheets also show up in cabinetry, wall panels, doors, and even flooring. If you walk into a hotel lobby or a modern office, chances are you’re seeing wood veneer sheets on the walls or furniture.
Furniture: Wood veneer sheets add elegance and durability to tables, desks, and cabinets.
Cabinetry: Kitchens and bathrooms often use wood veneer sheets for a high-end look.
Wall Panels: You can create warm, inviting spaces in homes or businesses.
Doors: Veneered doors combine style with strength and insulation.
Flooring: Engineered wood flooring uses wood veneer sheets for a hardwood appearance with extra stability.
Many wood veneer companies now offer eco-friendly and FSC-certified options, so you can choose sustainable materials for your next project. If you want a unique look, custom wood veneer lets you match grain patterns or select rare species. Whether you’re a DIYer or working with a professional, wood veneer suppliers can help you find the right wood veneer sheets for your needs.
Veneer
Types
When you shop for veneer, you’ll see several types, each with its own strengths. Here’s a quick rundown:
Natural Wood Veneers
These come straight from tree trunks. You get real wood grain and unique patterns. Some wood veneer sheets are thick, while others are paper-thin. You can even find bamboo or exotic dyed options.Engineered Wood Veneers
Sometimes called reconstituted veneers, these use artificial wood sheets. Manufacturers slice and dye them to mimic rare species. You get a consistent look, which helps if you want all your wood veneer sheets to match.Backed Wood Veneers
These have a backing—like paper, foil, or cloth. The backing adds strength and flexibility. You can bend these wood veneer sheets around curves without cracking.Veneer Rolls
These are super thin sheets joined together. You’ll find them handy for furniture edges or tricky shapes. They’re flexible and durable.
Note: Cutting techniques like rotary, flat, quarter, or rift slicing change the grain pattern. You can ask wood veneer suppliers or a wood veneer company about the best cut for your project.
Applications
You can use veneer in so many ways. Here are some common applications:
Furniture fitting and lining: Wood veneer sheets and non-wood options finish tables, cabinets, and shelves.
Doors and architectural elements: Veneers add style to doors, frames, and trim.
Paneling, cladding, and flooring: You can cover walls, ceilings, and floors for a warm, natural look.
Commercial spaces: Hotels, restaurants, offices, and hospitals often use veneer for a polished finish.
Residential projects: Single-family homes, apartments, and townhouses all benefit from the beauty and versatility of veneer.
If you want something special, custom wood veneer lets you match grain or pick rare species. Many wood veneer suppliers and wood veneer companies offer eco-friendly choices, so you can create beautiful spaces and stay green.
Looking for a unique finish? Ask your wood veneer supplier about custom wood veneer options for your next project!
Key Differences
Comparison Table
You probably want a quick way to see how wood veneer sheets stack up against other veneer materials. Here’s a handy table that breaks down the main differences. This can help you decide which option fits your project best, whether you’re shopping from wood veneer suppliers, working with a wood veneer company, or looking for custom wood veneer.
Aspect | Wood Veneer Sheets | Other Veneers / Materials (Laminate, Solid Wood) |
Durability | Susceptible to scratches, dents, and moisture damage. Needs regular care. Less durable than solid wood. Repairing is tricky, and refinishing is limited. | Laminate is tougher and resists damage. Solid wood is the strongest, easiest to repair, and can be refinished many times. |
Appearance | Real wood grain and natural look. Wide range of finishes and species. Lighter and more uniform than solid wood. | Laminate looks less natural. Solid wood has unique grain and a heavier, more substantial feel. |
Cost | More affordable than solid wood. Moderate price. Great for getting a wood look without the high price. | Laminate is usually cheaper. Solid wood costs the most. |
Maintenance | Needs gentle cleaning and quick spill cleanup. More care than solid wood. | Laminate is low-maintenance. Solid wood needs regular care but is more forgiving. |
Sustainability | More eco-friendly. Uses thin wood layers and recycled core materials. | Laminate uses more synthetic materials. Solid wood uses more timber, so it’s less sustainable. |
Tip: If you want the look of real wood but need to stick to a budget, wood veneer sheets from reputable wood veneer suppliers or a custom wood veneer company can be a smart choice.
Price Ranges
You’ll notice that wood veneer sheets come in a variety of price points, depending on the species, thickness, and whether you’re buying from a wood veneer company or ordering custom wood veneer. Here’s a quick look at some average prices:
Product Type | Description | Average Price Range |
|---|---|---|
Dyed Birdseye Maple Veneer Sheets | Thin dyed sheets for flooring and furniture | $1.1 – $3 per sq. meter |
Red Oak Fancy Plywood | Natural wood veneer sheets for commercial use | $1.1 – $3 per sq. meter |
Bamboo Charcoal Wood Veneer Wall Panels | Decorative panels with acoustic properties | $20 – $35 per piece |
3D Art Engineered Recon Veneer Sheets | Luxury decorative veneer on plywood/MDF | $20 – $35 per piece |
Acoustic Wall Panels | Wood veneer finish for sound enhancement | Around $35 per piece |
Moisture-Resistant Fluted Panels | Decorative panels with moisture resistance | $18 – $24 per piece |
Note: Prices for synthetic or plastic veneers may be lower, but you won’t get the same authentic look as with wood veneer sheets.
Lifespan
How long will your wood veneer sheets last? That depends on how you care for them and the quality you choose. Take a look at this chart for a quick comparison:

High-quality wood veneer sheets (thicker than 1mm) can last over 15 years.
Well-maintained veneer can last 50+ years.
Thin, low-quality veneer may only last around 5 years.
Proper care, moisture control, and installation make a big difference.
Pros and Cons
Let’s break down the main advantages and disadvantages of wood veneer sheets compared to other veneer options. This will help you decide if you should ask your wood veneer supplier for standard or custom wood veneer, or if another material might work better.
Pros of Wood Veneer Sheets
You get the look and feel of real wood, including natural grain, texture, and color.
Wood veneer sheets cost less than solid wood, making them budget-friendly.
You can choose from a huge variety of wood species and patterns, including rare and exotic types through custom wood veneer.
Wood veneer sheets are lightweight, so you can move and install them easily.
They are more eco-friendly than solid wood, using less timber and often coming from responsibly managed forests. Many wood veneer companies offer FSC-certified and low-VOC options.
Wood veneer sheets resist warping and splitting better than solid wood.
You can use rare or expensive woods affordably by working with wood veneer suppliers who offer custom wood veneer.
Cons of Wood Veneer Sheets
The thin layer of wood makes repairs tricky. Sanding or refinishing can remove the veneer if you’re not careful.
Wood veneer sheets can peel or chip over time, especially if not installed or maintained properly.
They are more vulnerable to water damage and need careful maintenance.
The lighter weight may feel less sturdy than solid wood.
Lifespan is shorter than solid wood, especially for thin or low-quality veneer.
If you want to refinish or repair, you have limited options compared to solid wood.
Pros of Other Veneers (Laminate, Solid Wood)
Laminate is tough, resists scratches, and is easy to clean.
Solid wood is the most durable and can be refinished many times.
Laminate is usually the cheapest option.
Solid wood gives you a heavy, substantial feel and unique grain.
Cons of Other Veneers
Laminate lacks the authentic look and feel of real wood.
Solid wood is expensive and uses more timber, which isn’t as eco-friendly.
Laminate can look artificial and may not last as long as high-quality wood veneer sheets.
Note: If sustainability matters to you, look for wood veneer sheets with certifications like FSC, PEFC, or MAS Certified Green®. Many wood veneer suppliers and companies highlight these eco-friendly options.
Maintenance Tips
Clean wood veneer sheets with a soft cloth and mild soap. Avoid harsh chemicals.
Wipe spills right away to prevent water damage.
Use coasters and mats to protect surfaces.
Keep wood veneer sheets out of direct sunlight to avoid fading.
Trim and sand edges carefully when installing, and always follow your wood veneer company’s care instructions.
Choosing between wood veneer sheets and other materials comes down to your priorities—budget, appearance, durability, and sustainability. If you want the real wood look with flexibility and eco-friendly options, talk to your wood veneer supplier about custom wood veneer for your next project.
How to Apply Wood Veneer Sheets
Applying wood veneer sheets can seem tricky at first, but you can get professional-looking results with the right tools, materials, and a little patience. Whether you want to upgrade furniture, add wood veneer edging, or tackle a creative DIY, this wood veneer tutorial will walk you through every step.
Tools and Materials
Before you start, gather everything you need. Having the right tools makes the process smoother and helps you avoid mistakes.
Wood veneer sheets (choose a size with a little extra overlap)
Substrate (like plywood, MDF, or solid wood)
Sharp utility knife or box cutter (fresh blades work best)
Cutting mat or scrap plywood for a safe work surface
Metal clamps (old or new, both work)
Painter’s tape (blue or green)
Ruler or tape measure
Sandpaper (120 and 220 grit)
Sanding block or sponge
Wood glue or the best adhesive for applying wood veneer (weldwood contact cement is a popular choice)
Roller (wallpaper roller or J-roller)
Wax paper (helps prevent sticking)
Safety gear: gloves, mask, and goggles
Optional: iron (for pre-glued edge banding), edge trimmer, finishing wax or polish
Tip: If you’re new to this, try peel-and-stick or paper-backed wood veneer sheets. These beginner-friendly options make it easier to apply wood veneer without worrying about messy glue.
Step-by-Step Process
Let’s break down how to apply wood veneer sheets so you can get a flawless finish:
Prepare Your Workspace
Clean your work area and make sure you have good ventilation. Lay out your tools and materials. Put on your safety gear—gloves, mask, and goggles—to protect yourself from dust and fumes.Prep the Substrate
Sand the surface until it’s smooth and dust-free. Wipe away any debris. If you’re working with edges, make sure they’re level and ready for wood veneer edging.Measure and Cut Wood Veneer
Measure your substrate and cut wood veneer sheets about an inch larger on all sides. Use a sharp utility knife and a ruler for straight lines. For curved surfaces, gently bend the veneer to test flexibility before you cut wood veneer to fit.Tape Off Edges
Use painter’s tape to protect areas you don’t want to glue. Trim the tape with a razor for a clean edge.Apply Adhesive
Stir weldwood contact cement well. Use a roller or brush to spread a thin, even coat on the back of the veneer and on the substrate. Cover all the way to the edges. Let both surfaces dry until they feel tacky and glossy—usually 20 minutes to an hour. For extra hold, apply a second coat of weldwood contact cement and let it dry again.Align and Place the Veneer
Remove the painter’s tape. Place wax paper between the veneer and substrate to prevent instant sticking. With a helper, align the veneer carefully, starting at the center and working outward. Slide out the wax paper as you press the veneer down.Press and Clamp
Use a roller to press the veneer firmly, pushing out any air bubbles. For large or tricky pieces, use metal clamps or a vacuum press for even pressure. If you’re working with wood veneer to curved surfaces, use flexible backed veneer and extra clamps to keep it tight.Trim and Sand Edges
Once the adhesive sets, flip the piece over. Trim the excess veneer with a sharp utility knife, cutting into the substrate to avoid tear-out. For wood veneer edging, use an edge trimmer or flush trim router bit. Sand the edges gently with a sanding block, moving in the direction of the grain.Finish the Surface
If you want to change the color, now’s the time to learn how to stain wood veneer. Apply stain evenly, let it dry, then seal with finishing wax or polish for protection.
Safety Reminder: Always use adhesives like weldwood contact cement in a well-ventilated space. Wear gloves and a mask to avoid fumes and skin contact. Clean up spills right away and follow all safety instructions on the label.
Beginner Tips
Choose the Right Veneer: Birch, maple, walnut, ash, and white oak veneers are great for beginners. Look for higher grades (AA or A) with fewer imperfections.
Go for Easy Options: Peel-and-stick and paper-backed wood veneer sheets save time and reduce mess. They’re perfect if you want to apply wood veneer without fuss.
Grain Alignment Matters: Always check the grain direction before you glue wood veneer. Aligning the grain with the substrate or using a cross-grain pattern adds strength and prevents cracking.
Prevent Water Damage: Use a water-resistant finish like Osmo 420 oil after installation. Wipe up spills quickly and avoid placing veneer in damp areas.
Flatten Before Use: If your veneer arrives curled, flatten it with a softening solution and press it between boards overnight.
Trim with Care: Use a sharp blade and clamp a strip above the veneer to prevent chipping. Sand by hand, not with power tools, to avoid sanding through the thin layer.
Practice on Scrap: Try your technique on a small piece before tackling your main project. This helps you get comfortable with the process.
Note: If you want a smooth, professional look, take your time with each step. Rushing can lead to bubbles, cracks, or misaligned edges.
With these steps and tips, you can confidently apply wood veneer sheets to furniture, cabinets, or even creative DIY projects. Practice makes perfect, so don’t be afraid to experiment and learn as you go!
Choosing the Right Veneer
For Furniture
Picking the right veneer for furniture can feel overwhelming, but you can make it simple by focusing on your needs and style. Many interior design pros suggest wood veneer if you want a natural look, lighter weight, and a budget-friendly option. You get authentic wood grain and a warm appearance, which works well for both modern and classic pieces.
Here are some things to keep in mind when you want to apply veneer to furniture:
Wood veneer is great for detailed or curved designs because it bends easily and keeps furniture light.
Veneer furniture costs less than solid wood and gives you more style choices.
If you need furniture for heavy use, remember that veneer can scratch or chip, though new finishes help protect it.
Solid wood lasts longer and is easier to repair, but it’s heavier, more expensive, and reacts to changes in temperature and humidity.
Bamboo veneers are a top pick for eco-friendly and modern designs. They’re strong, light, and easy to stain.
Traditional styles like mahogany and walnut veneers add elegance and work well for timeless furniture.
Tip: If you want a classic look that’s easy to move and fits your budget, wood veneer is a smart choice.
For DIY Projects
When you start a DIY project, you want materials that are easy to use and fit your skill level. Veneer comes in many types, so you can find one that matches your project and experience.
Choose beginner-friendly options like paper-backed or peel-and-stick veneer sheets. These are easy to cut and apply, even if you’re new to woodworking.
Match the veneer to your project. Use peel-and-stick for small repairs or edge banding, and paper-backed for flat surfaces like shelves or tabletops.
Stick with simple tools—utility knives, rollers, and contact cement work well for most DIY jobs.
Think about the grain pattern and color. Light woods like birch or pine suit modern or Scandinavian styles, while cherry and mahogany fit traditional looks.
Save money by using premium veneer only on visible surfaces or buying remnants for small projects.
Practice on scrap wood before working on your main piece. This helps you get comfortable with the process.
Feature | Wood Veneer Panels | Solid Wood |
|---|---|---|
Cost | Affordable, budget-friendly | Expensive |
Ease of Use | Lightweight, easy for DIY | Heavy, harder to handle |
Durability | Durable with care | Very durable |
Sustainability | Uses less timber, eco-friendly | Less sustainable |
Note: Start with manageable veneer types and simple projects. You’ll build skills and confidence as you go.
You now know that wood veneer sheets stand out for their natural grain and warmth, while other veneer types offer different backing and flexibility. When you apply veneer, remember to prep your surface, use the right adhesive, and press firmly for a smooth finish. If you want durability and a classic look, pick thicker veneers for furniture or high-wear areas. Always match your choice to your project’s needs and style for the best results.
FAQ
What are wood veneer sheets, and how do they differ from laminate?
Wood veneer sheets use real wood sliced thin, so you get natural grain and texture. Laminate uses printed patterns on plastic or paper. If you want an authentic look, wood veneer sheets from trusted wood veneer suppliers or a wood veneer company work best.
Can I order custom wood veneer for my project?
Yes! Many wood veneer suppliers and wood veneer companies offer custom wood veneer options. You can pick the species, grain, and even the finish. Custom wood veneer lets you match your style or existing furniture perfectly.
How do I find reliable wood veneer suppliers?
Look for wood veneer suppliers with good reviews, clear product details, and helpful customer service. A reputable wood veneer company will answer your questions and offer samples. Ask about custom wood veneer if you need something unique.
Are wood veneer sheets easy for beginners to use?
Absolutely! Many wood veneer sheets come in peel-and-stick or paper-backed styles. These options make it simple for beginners. You can ask your wood veneer supplier for advice or choose a custom wood veneer that fits your skill level.
What should I consider when choosing wood veneer sheets for furniture?
Think about durability, grain pattern, and color. Ask your wood veneer company about the best species for your project. Custom wood veneer gives you more control over the final look. Always check with wood veneer suppliers for eco-friendly options.


