

You will notice a clear difference between laminate and wood veneer sheets. Laminate uses synthetic materials to create a consistent finish, while wood veneer sheets use thin slices of real wood for a natural look. This choice matters when you want your furniture to match your style, last longer, or fit your budget. Think about how you want your finished project to look and feel before you decide which material to use.
Key Takeaways
Laminate sheets use synthetic materials with printed designs for a durable, low-maintenance surface that resists scratches and moisture.
Wood veneer sheets are thin slices of real wood that offer a natural, unique look and can be sanded, stained, or repaired.
Laminate is more affordable and ideal for high-use furniture, while veneer costs more but provides a premium, authentic wood appearance.
Applying wood veneer requires careful preparation, the right adhesive, and gentle finishing to achieve a strong, beautiful result.
Choose laminate for easy care and consistent style; pick veneer for custom, elegant furniture that shows real wood grain.
Material Comparison
Laminate Construction
You will find that laminate wood sheets use synthetic materials and engineered wood to create a strong and uniform surface. Manufacturers build laminate by pressing layers of heavy-duty paper with melamine resin. They harden these layers under heat and pressure, then bond them to a substrate such as fiberboard or particleboard. High-pressure laminate uses intense pressure and heat, while low-pressure laminate relies on lower pressure and higher temperatures.
Laminated veneer lumber (LVL) is another type of laminate. It consists of multiple thin layers of wood veneer, often from species like Douglas fir, Yellow poplar, Southern pine, Radiata pine, and rubberwood. These veneers are aligned and bonded with high-strength adhesives, resulting in a durable engineered wood product. Plywood sheets also fall under laminate construction. Manufacturers layer veneers from hardwoods like birch and softwoods, using adhesives to bond them. Marine plywood uses waterproof glue for extra water resistance.
Tip: When choosing laminate for DIY furniture, look for sheets with a strong substrate. This ensures stability and longevity for your project.
Laminate sheets often feature a printed wood grain pattern. The image sits beneath a transparent layer, giving the appearance of wood without the natural texture. You can select from many designs, but the look remains consistent across each sheet.
Adhesives play a key role in laminate production. Water-based adhesives, such as PVA glues, are popular for their eco-friendliness and strength. Solvent-based adhesives offer moisture resistance, making them suitable for kitchens and bathrooms. Hot melt adhesives work well for edge banding and high-speed production.
Table: Common Adhesives Used in Laminate Construction
Adhesive Type | Features | Best Use Cases |
|---|---|---|
Water-based | Eco-friendly, easy to clean | Dry surfaces, indoor furniture |
Solvent-based | Moisture resistant, durable | Kitchens, bathrooms |
Hot melt | Quick solidification, strong grip | Edge banding, fast production |
Rubber-based | Heat resistant, superior bonding | High-stress joints |
Laminate wood sheets offer a consistent finish and resist scratches and moisture. You can use them for surfaces that need durability, such as tabletops and cabinets.
Wood Veneer Sheets
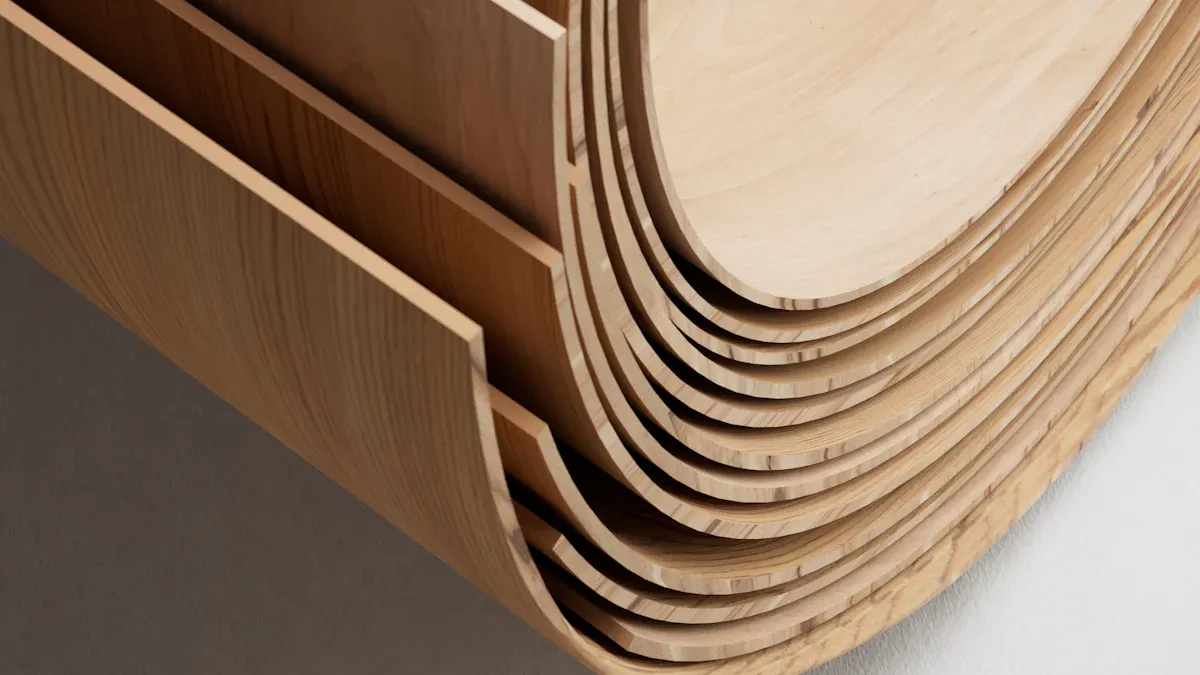
You will notice that wood veneer sheets use thin slices of real wood to create a natural and elegant finish. Manufacturers slice wood sheets about 3 millimeters thick and glue them onto a substrate like particleboard, MDF, or plywood. This process preserves the authentic grain, color, and texture of the wood.
Commercial veneer thickness usually measures around 0.6 millimeters. Resawn veneers are thicker, about 1 to 1.2 millimeters. Some projects use veneers up to 1/8 inch (about 3.2 mm), which provides more strength but may cause movement issues. Thinner veneers allow for minimal wood movement and suit most furniture applications.
Wood veneer sheets stand out for their unique grain patterns. Each sheet displays natural variations in color and texture, giving your furniture a rich and tactile appearance. Unlike laminate, which uses a printed image, veneer offers the real look and feel of wood.
Note: If you want your DIY furniture to have a custom look, wood veneer sheets let you choose from many wood species and grain patterns. You can source them from wood veneer suppliers or a wood veneer company for specific needs.
Veneer manufacturing uses less energy and can be more environmentally friendly if you choose responsibly sourced wood. FSC certification ensures sustainable forestry practices. Veneers use wood efficiently by slicing thin sheets, reducing waste compared to solid wood.
Veneering Differences
You will see clear differences between laminate and basic wood veneering when you compare their construction and application. Laminate relies on synthetic materials and printed designs, while basic wood veneering uses real wood slices for a natural finish.
In laminate production, manufacturers press layers of paper and resin under heat and pressure, then bond them to a substrate. The process creates a durable, scratch-resistant surface but lacks the authentic grain and texture of wood. Laminate cannot be repaired or refinished easily and often ends up in landfills due to its non-renewable composition.
Basic wood veneering involves slicing thin sheets of wood and gluing them onto a substrate. This technique preserves the natural grain and allows you to refinish or repair the surface if needed. Veneering uses less wood than solid lumber, making it resource-efficient. You can apply wood veneer sheets to many substrates, including MDF, particleboard, and plywood.
Unordered List: Veneering vs. Laminate
Veneering uses real wood slices for a unique, natural look.
Laminate uses synthetic layers and printed designs for consistency.
Veneering allows refinishing and repair; laminate does not.
Veneering is more environmentally friendly if sourced sustainably.
Laminate resists scratches and moisture better than veneer.
Tip: For DIY furniture, consider basic wood veneering if you want a custom wood veneer look and the ability to refinish your project. Choose laminate if you need a tough, low-maintenance surface.
You can use veneering techniques to cover large surfaces with minimal wood waste. Veneering also lets you experiment with different wood species and patterns, giving your furniture a personalized touch.
When you select between laminate and wood veneer sheets, think about your project's needs, the desired appearance, and how much care you want to invest in maintenance. Both materials offer unique benefits for DIY furniture makers.
Appearance & Texture
Laminate Look
When you choose laminate for your DIY furniture, you get a surface that looks consistent and uniform. Manufacturers use printed designs to mimic wood grain or stone, so every sheet looks almost identical. This makes it easy to match pieces and create a modern, clean style. Laminate comes in many colors and finishes, such as matte, glossy, or textured. Some advanced laminates even feel slightly grainy or leather-like to the touch.
Here is a quick comparison of how laminate and veneer differ in appearance:
Feature | Wood Veneer | Laminate |
|---|---|---|
Material Type | Natural thin sliced wood | Man-made synthetic material |
Appearance | Authentic wood grain; unique patterns | Printed designs mimicking wood or stone |
Customization | Can be stained, sanded, or polished | Limited to available patterns and colors |
You will notice that laminate resists scratches and moisture, making it a practical choice for busy spaces. However, the look remains the same across all sheets, so you do not get the unique grain or color changes that real wood offers.
Tip: If you want a wide range of colors and patterns with low maintenance, laminate gives you many options for your next project.
Veneer Feel
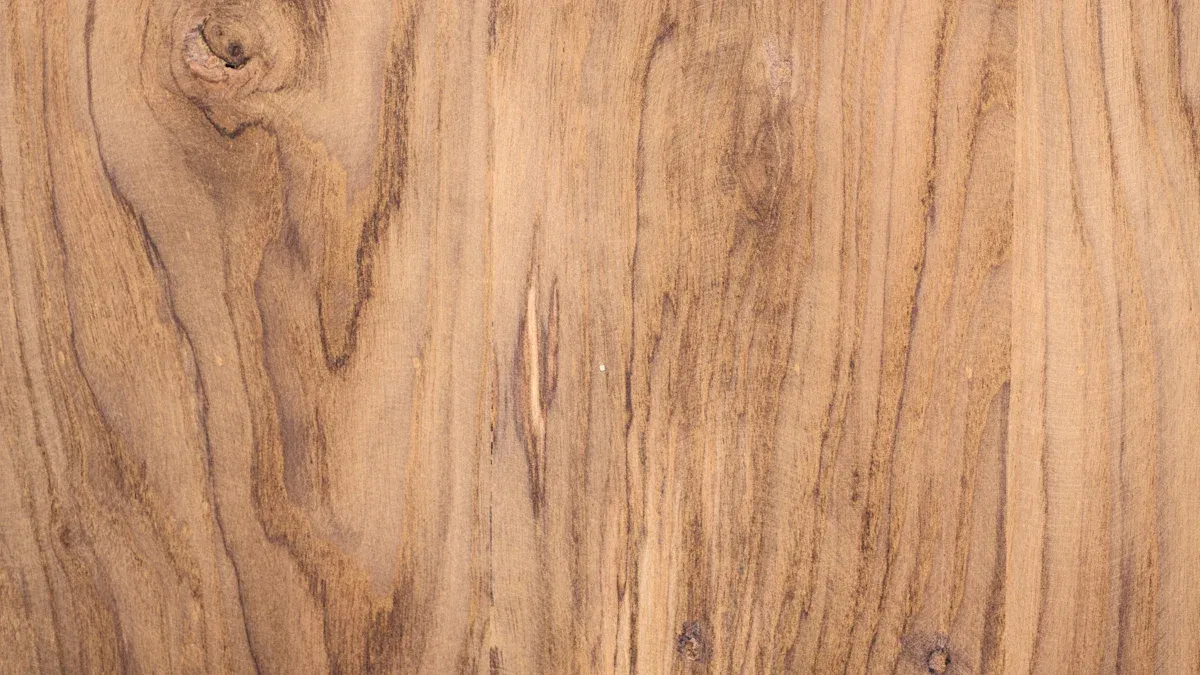
When you touch wood veneer sheets, you feel the difference right away. Veneers use thin slices of real wood, such as teak or mahogany, so the surface feels warm and natural. Each sheet shows unique grain patterns and textures, giving your furniture a rich and elegant look. You can sand, stain, or polish veneer to change its color or finish, which lets you customize your project.
Veneer surfaces require more care than laminate. You need to polish and protect them to keep their authentic wooden texture. Unlike laminate, veneer can show small marks or scratches, but you can often repair or refinish the surface.
Veneer offers a tactile, genuine wood feel that adds character to your furniture.
Laminate provides a consistent, artificial texture that is durable but less authentic.
You get a unique, premium look with veneer, but you also take on a bit more maintenance. If you want your furniture to have a natural touch and a one-of-a-kind appearance, veneer is the way to go.
Durability & Care
Laminate Maintenance
Laminate wood sheets give you a tough, low-maintenance surface for DIY furniture. You can count on laminate to resist scratches, heat, stains, and impacts. This makes it a smart choice for high-use areas like kitchen cabinets, tabletops, and office desks. The non-porous surface keeps out moisture and stains, so you do not have to worry about spills or daily messes.
To keep laminate looking its best, follow these simple steps:
Wipe surfaces with a soft, damp cloth and mild soap.
Avoid abrasive cleaners, harsh chemicals, or rough sponges.
For tough stains, use diluted rubbing alcohol or mild dish soap.
Do not use acetone, ammonia, or paint thinners.
Laminate’s durability depends on several factors:
Quality of raw materials and brand reputation
Surface finish (matte, glossy, textured)
High-pressure laminate (HPL) offers extra strength for busy spaces
Proper installation ensures long-term performance
Tip: Laminate is ideal for high-traffic DIY projects because it needs little care and stands up to daily wear.
You can find laminate sheets in many designs, including wood grain, stone, and metal looks. This versatility lets you match your furniture to any style without worrying about fading or damage.
Veneer Maintenance
Wood veneer sheets bring natural beauty and a custom wood veneer finish to your furniture, but they need more careful maintenance. Veneers use thin slices of real wood, so they are more delicate than laminate. You must protect them from scratches, dents, and water damage.
Common causes of veneer damage include:
Scratches from sharp objects or pets
Chips or missing pieces at edges and corners
Water or humidity causing glue to soften, leading to peeling or bubbling
Heat marks from hot items placed directly on the surface
To care for wood veneer sheets:
Dust regularly with a soft, dry cloth
Polish with products recommended by your wood veneer supplier or wood veneer company
Clean spills right away to prevent stains or swelling
Avoid direct sunlight and moisture to prevent fading or warping
Note: Veneer furniture can last for decades if you use high-quality materials and follow proper care steps. However, veneer is better for areas with less frequent use.
If you want a unique look, custom wood veneer gives you many options for grain and color. Always ask your wood veneer suppliers for care tips specific to your chosen veneer type. With the right maintenance, your veneer furniture will keep its elegant appearance for years.
Cost Overview
Laminate Pricing
When you shop for laminate wood sheets, you will notice that prices stay affordable for most DIY furniture projects. Laminate sheets use synthetic materials, which keeps production costs low. You can find wood-look laminate sheets for about $1 to $4 per square foot. Specialty styles, such as stone or tile patterns, may cost a bit more. The total installed cost, including labor, usually ranges from $3 to $14 per square foot. This makes laminate a budget-friendly choice for large surfaces like cabinets, desks, or shelving.
Laminate Floor Style | Material Cost per Sq. Ft. (USD) | Total Installed Cost per Sq. Ft. (USD) |
|---|---|---|
Wood | $1.00 – $3.75 | $2.00 – $10.00 |
Stone | $1.75 – $4.75 | $3.50 – $13.00 |
Tile | $1.50 – $4.75 | $3.00 – $13.00 |
Tip: Laminate sheets offer consistent quality and appearance at a lower price, making them ideal for high-traffic DIY furniture.
You can buy laminate from most hardware stores or through wood veneer suppliers that also carry laminate options. Laminate’s low cost and easy installation help you stay within budget while still achieving a stylish look.
Veneer Pricing
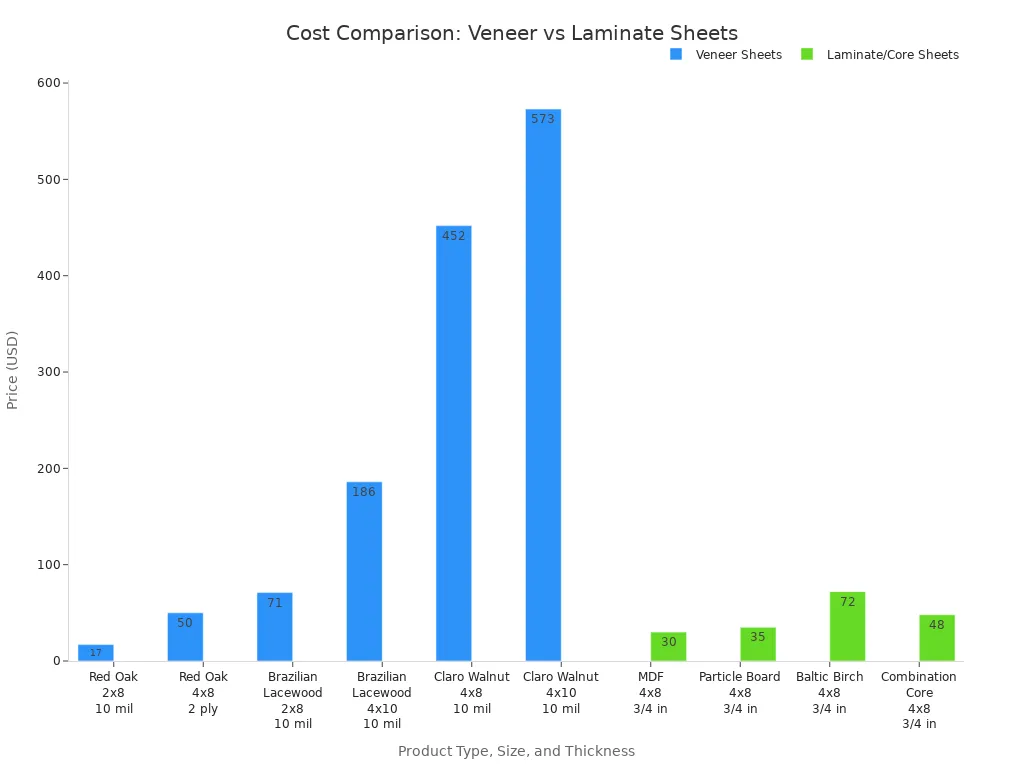
Wood veneer sheets cost more than laminate because they use real wood and require careful manufacturing. Prices vary based on wood species, sheet size, and thickness. Domestic species like red oak cost less, while exotic or rare woods such as Brazilian lacewood or figured walnut command much higher prices. For example, a 2 x 8-foot red oak veneer sheet may cost around $17, while a similar-sized exotic veneer can reach $71 or more. Premium custom wood veneer sheets, especially those from a reputable wood veneer company, can cost several hundred dollars per sheet.
Product Type / Species | Size (ft) | Thickness | Price Range (USD) |
|---|---|---|---|
Red Oak Plain Sliced (domestic) | 2 x 8 | 10 mil | $17 |
Brazilian Lacewood (exotic) | 2 x 8 | 10 mil | $71 |
Claro Walnut Figured (premium) | 4 x 8 | 10 mil | $452 |
Several factors influence the price of wood veneer sheets:
Popular timber species like oak, walnut, and teak cost more due to high demand and limited supply.
High-quality finishing and eco-friendly production methods raise costs.
Supply chain issues and import restrictions can cause price fluctuations.
Competition from laminates and engineered wood affects market pricing.
Maintenance needs and consumer demand for FSC-certified products also play a role.
Note: You can often find better deals by working directly with wood veneer suppliers or a specialized wood veneer company. Custom wood veneer options let you match your project’s style, but expect to pay more for rare species or unique grain patterns.
You should consider both material and installation costs when planning your DIY furniture project. While wood veneer sheets offer unmatched natural beauty, laminate remains the more affordable and practical option for many applications.
Apply Wood Veneer
Applying wood veneer sheets to your DIY furniture project can give you a professional, custom look. You need to follow the right steps and use the best wood veneering techniques to achieve a smooth, durable finish. This section guides you through preparation, adhesive selection, application, and finishing, so you can confidently apply veneer to furniture and avoid common mistakes.
Preparation
Proper preparation sets the foundation for a successful veneering project. Follow these steps to get your workspace and materials ready:
Set up a clean, well-lit workspace with a flat, sturdy surface.
Gather all necessary tools and materials before you begin.
Acclimate your wood veneer sheets by placing them in the workroom for at least 24 hours. This helps stabilize temperature and humidity.
Inspect each sheet for cracks or inconsistent grain patterns.
Check your substrate for flatness and stability. Sand down any high spots and fill low areas to create a smooth base.
Clean the substrate thoroughly to remove dust and debris.
Make sure both the veneer and substrate are in optimal condition before you apply wood veneer. This ensures strong adhesion and a professional finish.
Tip: Always measure twice and cut veneer to size before gluing. Use a sharp utility knife and a straight edge for clean, accurate cuts.
Adhesives
Choosing the best adhesive for applying wood veneer depends on your project and materials. Here are the most common options:
PVA (polyvinyl acetate) glues: Great for general use. You need to clamp the veneer while the glue dries.
UF (urea formaldehyde) resins: Provide strong, brittle bonds. These work well for curved surfaces.
Contact adhesives: Weldwood contact cement is a popular choice, especially for large pieces or on-site work. It is ideal for backed veneer.
Polyurethane glue: Waterproof and expands during curing. Use this in moisture-prone areas.
Super glue (cyanoacrylate): Best for small repairs or quick fixes.
Hot-melt adhesives: Set quickly and are often used with edge banding machines.
When you apply glue, make sure to spread it thinly and evenly with a roller. Always follow the manufacturer’s instructions for the adhesive you choose. Weldwood contact cement stands out for its ease of use and strong bond, making it a favorite among DIYers for both flat and curved surfaces.
Note: Maintain stable temperature and humidity during curing. This helps the adhesive set properly and prevents future problems.
Application Steps
You can use several wood veneering techniques to apply veneer to furniture. Here is a step-by-step guide:
Cut veneer to size, leaving a slight overhang on all sides.
Dry-fit the veneer on the substrate to check alignment and fit.
Apply glue to both the substrate and the back of the veneer. For contact adhesives like Weldwood contact cement, let both surfaces dry until tacky.
Carefully position the veneer on the substrate. Start at one edge and slowly press down, smoothing out air bubbles as you go.
Use a roller or a block to press the veneer firmly onto the substrate. For small projects, you can use wooden cauls and clamps to apply even pressure. Place parchment paper between the veneer and cauls to prevent glue seepage.
For larger or curved surfaces, vacuum pressing gives the best results. It applies even pressure across the entire surface, ensuring a strong bond.
Let the adhesive cure fully before trimming the excess veneer with a sharp knife.
For edge banding, use hot-melt adhesives or Weldwood contact cement. Press the banding firmly and trim the edges for a neat finish.
Alert: Avoid over-sanding the veneer after application. Use fine-grit sandpaper and work gently to prevent thinning or damaging the surface.
Common Mistakes and How to Avoid Them
Common Mistake | How to Avoid / Solution |
|---|---|
Over-sanding | Use fine-grit sandpaper lightly to avoid damaging veneer or creating thin spots. |
Wrong adhesive choice | Use adhesives recommended for veneer like contact cement or specialized veneer glue; follow instructions. |
Uneven glue application | Apply glue evenly using a roller to prevent uneven surfaces. |
Improper clamping | Use multiple clamps to apply even pressure without over-tightening to avoid weak bonds and air pockets. |
Poor surface preparation | Sand surface smooth, remove dust/grease, ensure flatness before veneering to prevent bubbles and peeling. |
Inaccurate measuring/cutting | Measure carefully, use straight edges and squares, practice on scrap wood for precision. |
Neglecting curing conditions | Maintain stable temperature (65-75°F) and humidity (<50%) during adhesive curing for strong bonds. |
Finishing
Finishing is the final step in basic wood veneering. It protects your work and brings out the natural beauty of the wood veneer sheets.
Sand the veneer lightly with fine-grit sandpaper to smooth the surface.
Remove all dust with a tack cloth.
Apply your chosen finish—oil, varnish, or lacquer—using a brush or cloth. Always follow the grain of the wood.
Allow each coat to dry completely before applying the next.
For a high-gloss finish, sand lightly between coats and wipe away dust.
Seal the edges carefully to prevent moisture from lifting the veneer.
Tip: Always test your finish on a scrap piece of veneer first. This helps you see how the color and sheen will look on your project.
You can use these wood veneering techniques to create custom designs, repair damaged surfaces, or upgrade plain furniture. When you apply veneer to furniture with care and attention to detail, you achieve a result that looks professional and lasts for years.
DIY Project Tips
Laminate Pros & Cons
When you plan a DIY furniture project, you want materials that match your needs. Laminate wood sheets offer many benefits for busy homes and workspaces. You can clean laminate easily with a damp cloth. The surface resists scratches, stains, and water, so you do not need to worry about spills or heavy use. Laminate comes in many colors and patterns, which helps you match your furniture to your room style.
You may find some drawbacks with laminate. The printed design does not look as natural as real wood. If you damage the surface, repairs can be difficult and expensive. Laminate uses synthetic materials, which may raise environmental concerns for some users.
Here is a quick overview:
Factor | Laminate Characteristics |
|---|---|
Maintenance | Easy to clean; scratch-resistant; waterproof |
Aesthetics | Wide variety of colors and designs; lacks unique wood grain patterns |
Durability | Durable; resists scratches and stains |
Cost | More affordable; price varies by quality and brand |
Utility | Great for high-use furniture like kitchen cabinets and wardrobes |
Resistance to Water | High resistance; protects furniture from spills |
Resistance to Heat | Good heat resistance; can be damaged by extreme heat |
Tip: Choose laminate for furniture that gets daily use, such as desks, cabinets, or shelves.
Veneer Pros & Cons
Veneering gives your furniture a natural and elegant look. You use thin slices of real wood, which show unique grain patterns and textures. Veneer lets you refinish or repair the surface if it gets scratched. You can select from many wood types, colors, and finishes, so your project stands out.
You need to handle veneer with care. The thin layer can scratch or dent more easily than laminate. Veneer requires regular cleaning and polishing to keep its beauty. You must clean spills quickly to avoid damage. Veneering works best for statement pieces or furniture where appearance matters most.
Here is a summary:
Advantages of Veneer Wood Sheets | Disadvantages of Veneer Wood Sheets |
|---|---|
Use rare and expensive woods affordably | Thin layer prone to scratches and damage |
Natural wood beauty and variety | Difficult to repair compared to solid wood |
Suitable for decorative furniture | Needs careful handling and proper adhesive use |
Note: Veneering is ideal for custom furniture, decorative panels, and projects where you want a high-end look.
You can choose laminate for utility and easy care, or veneer for style and authenticity. Think about how you use your furniture and what look you want before you decide.
You see clear differences between laminate and wood veneer sheets. Laminate offers durability and easy care at a lower cost, while wood veneer sheets provide authentic wood grain and a premium look. Use this table to compare your options:
Factor | Wood Veneer Sheets | Laminate |
|---|---|---|
Appearance | Natural, unique | Imitates wood |
Durability | Needs care | Highly resistant |
Budget | More expensive | Affordable |
Choose wood veneer sheets from trusted wood veneer suppliers or a wood veneer company for custom wood veneer projects when you want style. Try mixing veneer types or adding accents. You can finish a project in a weekend and create furniture that matches your taste.
FAQ
What are wood veneer sheets used for in DIY furniture projects?
You use wood veneer sheets to cover surfaces and give furniture a real wood look. They help you create custom wood veneer finishes on cabinets, tables, and shelves. Many DIYers choose them for unique designs and cost savings compared to solid wood.
How do I choose a reliable wood veneer supplier?
You should look for wood veneer suppliers with good reviews and a wide selection. Ask about their sourcing practices and check if they offer FSC-certified wood veneer sheets. A reputable wood veneer company will answer your questions and provide samples.
Can I order custom wood veneer for my project?
Yes! Many wood veneer companies offer custom wood veneer options. You can select the wood species, grain pattern, and sheet size. Custom wood veneer helps you match your furniture to your style and project needs.
Are wood veneer sheets easy to repair if damaged?
You can repair minor scratches or chips on wood veneer sheets with wood filler or touch-up markers. For larger damage, you may need to replace the veneer section. Always follow care tips from your wood veneer supplier to keep your furniture looking great.
What is the difference between buying from a wood veneer supplier and a regular hardware store?
Wood veneer suppliers and wood veneer companies often provide higher quality, more variety, and custom wood veneer options. Hardware stores may offer fewer choices and less expert advice. For special projects, you get better results from a dedicated supplier.


